Creative Coding Projects
Autodesk Maya


TITLE: Basic Maya Python Programming
YOUR ROLE: Programmer
MEDIA: Creative Coding
SOFTWARE: Autodesk Maya
CLASS: DPA 6000 - Technical Foundations of Digital Production I
PROFESSOR: Joseph Theodore Kider
SEMESTER / TERM: FL 25
INSTITUTION: Clemson University
DESCRIPTION: To start my first graduate level coding course at Clemson University, I was given the task of creating three different pieces of code for Autodesk Maya. Each piece of code involved input variables being applied to either existing items in the scene, or items being created by the code itself. The first code (top) required the creation of a three point lighting set up to illuminate the trio of spheres featured. To do so, I made three variables labelled as each of the three major lights, backlight, fill light and key light. From there, I set the major variables of each via the "set attribute" command in python, giving each light a specific XYZ rotation, translation, scale, and properties for their intensity and exposure. When the code was run, all three lights were created with those attributes in mind and placed as they should be in the scene.
The next bit of code I had to write was one that created four cubes, renamed them and randomly scattered them across the Maya Viewports' X and Z axis. My approach saw me make three variables: a number of objects, an 'old name' set to Maya's basic poly cube designation, and the new name they would be set to. After that, I made a 'for' range that included the number of objects variable, and said any objects in that range would be assigned two more variables: randX and randY, which were two random.uniforms with their values set between -10 and 10. Once those were set up, I ran a series of commands to spawn the cubes, move them to those randomized coordinates, and applied a rename that changed them from the old name variable to the new name variable, resulting in the second top image.
My third requirement for the project saw me apply a color scheme made up of the Clemson University's three main colors, gray, orange and purple, onto a circle of spheres in an alternating pattern. To set up the color scheme itself, I made a list of each major color value followed by a variable called "all_spheres" that, when called upon, would select the spheres in the Viewport window. In order to apply the color scheme, I made another 'for' range that applied to the "all_spheres" variables, and then put three 'if' variables listed below to evenly distribute the color scheme:
if (i) % 3 == 1:
cmds.select(all_spheres[i], add=True)
cmds.polyColorPerVertex (all_spheres[i],rgb=REGALIA, cdo=True)
if (i) % 3 == 2:
cmds.select(all_spheres[i], add=True)
cmds.polyColorPerVertex (all_spheres[i],rgb=GRAY, cdo=True)
if (i) % 3 == 0:
cmds.select(all_spheres[i], add=True)
cmds.polyColorPerVertex (all_spheres[i],rgb=ORANGE, cdo=True)
Finally, my last part of this project was to create the spiraling stairwell of cubes shown at the bottom using python code, which I did via a series of mathematical equations placed into a 'for' loop. My exact variables and equations used can be found below, with both the xRadius and zRadius variables being applied to a move command to create the final staircase.
degrees_value = 360
radians_value = math.radians(degrees_value)
angle_deg = (360.0 / N) * i
xRadius = 3 * math.cos(radians_value)
zRadius = 3 * math.sin(radians_value)
height_step = 0.5

Visual Code Studio
TITLE: Painting Recreation with Matplotlib
YOUR ROLE: Programmer
MEDIA: Creative Coding
SOFTWARE: Visual Code Studio
CLASS: DPA 6000 - Technical Foundations of Digital Production I
PROFESSOR: Joseph Theodore Kider
SEMESTER / TERM: FL 25
INSTITUTION: Clemson University
DESCRIPTION: To explore a creative application of the Matplotlib add-on for Python, my goal for this assignment was to recreate a famous painting via code that would sample the original image, then place a set number of dots across the graph. These dots would gradually decrease in size in order to best recreate the image, which for my project was Magritte's The Son Of Man. To import the image for sampling, I downloaded the original artpiece and then used an img.open command to properly import it, which was followed by using Numpy's np.array command to convert it to an array. After much experimenting, I found that the optimal amount of dots that both covered the canvas fully and avoided straining my computer's systems was about 9000, which let me then determine the minimum radius of 0.1 and the starting, maximum radius of 50. I then set the decay rate to 0.002 so that the spheres would shrink drastically, allowing for the finer edges of where certain colors meet to be populated by the tinest spheres created. Finally, in order to note overload my computer or draw out rendering time, I set a batch size variable to load ten spheres at a time, as I was also supposed to document the generation process visually. Once I had set functions up to save the rendered images to a specific folder and set the canvas properties so that the background was white, all the axes, labels and ticks were disabled and I had the size set properly, I created an function called 'animate' that included the variable holding the exact number of frames, 550, that I needed to make. From there, I made a start_index and end_index variable where the first was the frame number multiplied by the batch size, and the latter was the start_index multiplied by the batch size. Then I created code that used random values to place the spheres along the x and y coordinates, with their smallest values being 0 and the largest being the width and height values of the canvas by 1. Once I had set up a patches.circle value to actually create the spheres, I appended that variable and made one final 'main' function that would run all of the above code.

TITLE: Numpy/PIL Flag Creator
YOUR ROLE: Programmer
MEDIA: Creative Coding
SOFTWARE: Visual Code Studio
CLASS: DPA 6000 - Technical Foundations of Digital Production I
PROFESSOR: Joseph Theodore Kider
SEMESTER / TERM: FL 25
INSTITUTION: Clemson University
DESCRIPTION: As part of my introduction to Numpy and PIL, as well as python classes, I was instructed to create code that would generate recreations of four different flags. Each had to be of increasing complexity, with the first two being predetermined: France and Finland. I started by making a "main" file that set the dimensions of each flag within a function, then called upon the colors being generated before running the imported classes. Said classes contained the rest of the data of each flag, which I kept in separate files. Another file was created to hold the data for all flags overall, being aptly named "flag". Within that class, I defined width and height of the flag arrays alongside a section on where to actually save the flags via separate functions for each, mostly as a safeguard to ensure the values loaded in when called upon in main. Each flag class in their own file saw functions made that spawned rows and columns of shapes via the flag array variable, using math to offset each column. The more complicated flags I picked, which were Argentina's and North Korea's, required further math equations and the introduction of coordinates and masking to create elements like the stars and circles seen on them. While I could not accurately recreate these details, by the end of it I was left with the following images on the right.


OOP Game
TITLE: Magic Mania
YOUR ROLE: Programmer
MEDIA: Creative Coding
SOFTWARE: Adobe Dreamweaver, Adobe Photoshop
HARDWARE: iPhone 11
CLASS: FMX 310
PROFESSOR: Santiago Echeverry
SEMESTER / TERM: SP 23
INSTITUTION: University of Tampa
DESCRIPTION: For the final of my Creative Coding class, we were tasked with creating an object oriented game, IE a game that is centered around interactive coded objects in some form or another. In my case, I decided to do something similar to what I did with my Sprite Sheet and create a game that used physical LEGO figures as sprites, specifically fantasy era ones. We were provided various older games from prior semesters to base our final games off of, one of which fit my idea of vanquishing monsters perfectly. Modifying the code to fit this idea was rather straight forward as I took the basic sprites from the original code and replaced them with my own, making sure to add code that switched between a variety of different sprites to vary the types of monsters. I did something similar with the knights you’re supposed to protect, albeit I modified the code that gives the player points by making it so that hitting any of the knights actually takes away points. From there, I coded a counter that added up the total points, a counter that kept track of how many spawned monsters were vanquished, and one tied to the knights to show the player how many, if any, friendly knights were accidentally caught in the crossfire so to speak!

Kinetic Topography
TITLE: Kinetic Typography
YOUR ROLE: Programmer
MEDIA: Creative Coding
SOFTWARE: Adobe Dreamweaver
CLASS: FMX 310 Creative Coding
PROFESSOR: Santiago Echeverry
SEMESTER / TERM: SP 23
INSTITUTION: University of Tampa
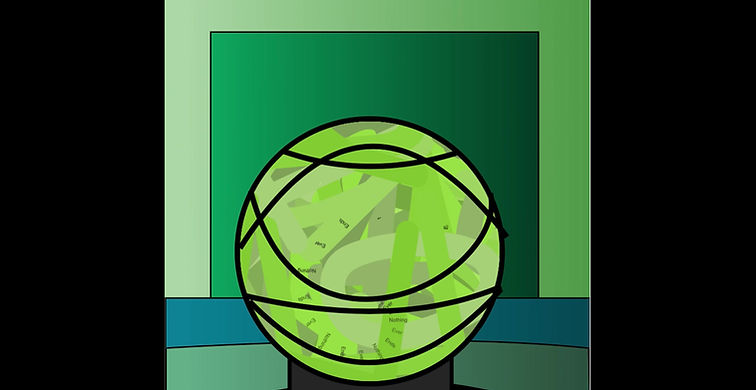
DESCRIPTION: Words can be a very powerful tool in the hands of the right person, whether they’re spoken, written or even thought. In the case of this project, we were to select a quote that held importance to us and make it into a kinetic illustration. In my case, I picked a quote from the Watchman comic said by Dr. Manhattan to Ozymandias near the end of the final issue, wherein the latter states the destruction he caused to bring an end to the Cold War was worth it ‘in the end’; to which Manhattan retorts with “‘In the end?’ Nothing ends, Adrian.” Its such a powerful quote for me and I sought to recreate the panel of the comic that sees Dr. Manhattan speak it, using the quote to represent the blue hero, the swirling sphere that he walks through and the mushroom cloud that appears in the following panel. For Dr. Manhattan, I traced an outline of one half of his body and mirrored it in order to ensure both halves were perfectly symmetrical, before adjusting the type within his body and the mushroom cloud to form at the same time as one another.